How to Browse, Filter, and Compare Products
Browse products by category, view details and pricing, and find the right product for you.
The product listing page
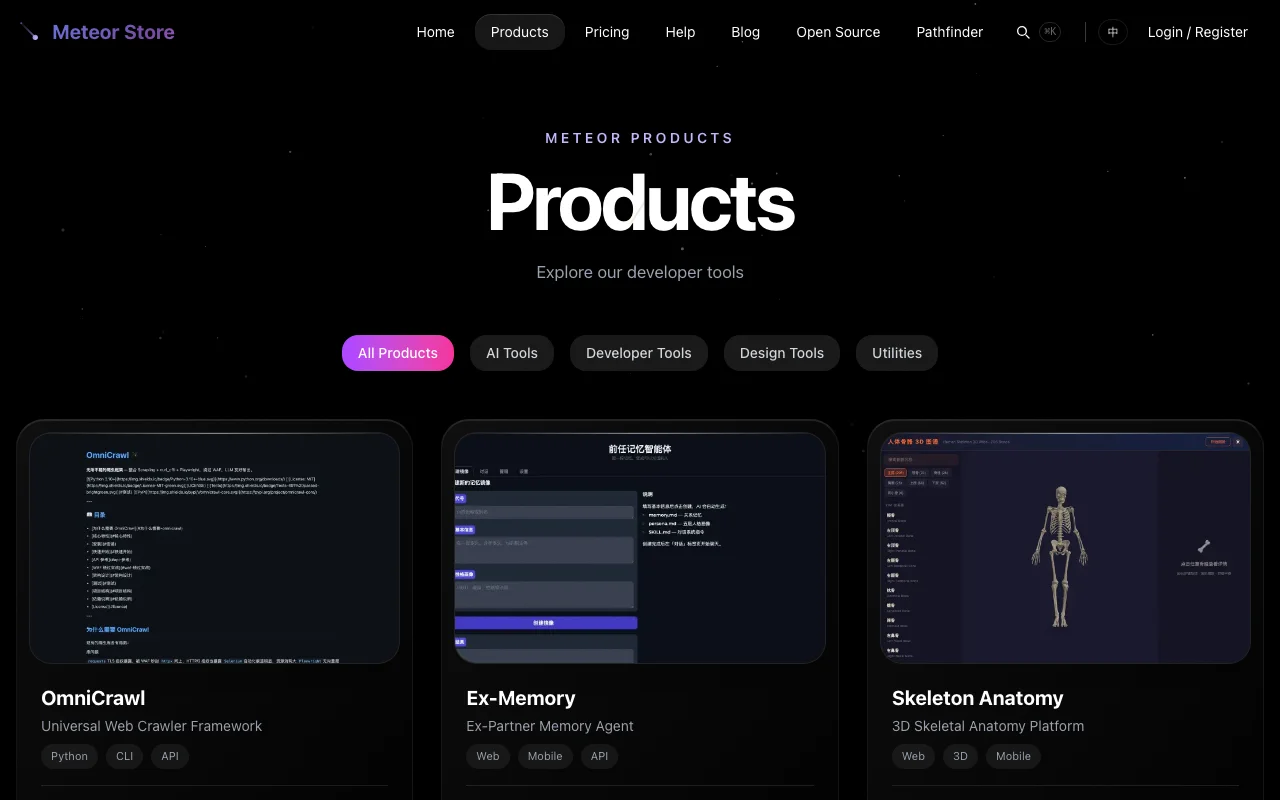 Click "Products" in the top navigation bar to open the product listing page. This page shows every available product in Meteor Store as a grid of cards.
Each product card carries four pieces of information: the product icon and name, a one-line tagline, a category label, and the lowest price. The lowest price is the minimum across all pricing tiers for that product, including free tiers. If a product has a ¥0 tier, the card shows ¥0 as the lowest price.
Cards are automatically grouped by category, so products in the same category sit together.
Filtering by category
A row of category filter buttons sits at the top of the product listing page. Four categories are available:
- AI — Tools related to artificial intelligence and machine learning.
- Developer — Frameworks, libraries, and utilities for developers.
- Design — Design resources and visualization tools.
- Utility — Practical tools that don't fit the categories above.
Click a category button to show only products in that category. Click it again to remove the filter and see all products. The filter state is reflected in the URL, so you can share a filtered view with others by copying the link.
The product detail page
Click any product card to open its detail page. A detail page contains much more than the card:
- Feature list — The product's core capabilities, itemized.
- Pricing tiers — Each tier's name, price, and included benefits. If a tier shows a crossed-out original price, the product is currently on a limited-time promotion.
- Download or trial entry — In-browser apps display an embedded trial area. Downloadable apps list installers with checksums. Some products also include a quick-start install command.
- Screenshots — Multiple interface screenshots so you can see what the product actually looks like.
The detail page is your primary resource for deciding whether a product fits your needs. Read the feature list and pricing tiers before buying or claiming.
Understanding product types
Meteor Store products are delivered in three ways, and the detail page indicates which one applies:
- In-browser apps — Open directly in the browser; nothing to download or install. The detail page includes an embedded trial area. After purchase, open the app from the My Products page.
- Downloadable apps — Distributed as
.dmginstallers. A download area at the bottom of the detail page lists the available files. Click to download after purchase. - License-key products — After purchase, the system generates a license key for you. Enter it inside the product to activate. License keys are viewable in your Account page.
For a deeper explanation of the three types, see the help article "What types of products are on the site, and how do they differ?"
Comparing multiple products
The listing page does not have a side-by-side comparison feature, but you can evaluate products effectively with these techniques:
- Open in new tabs —
Ctrl+click(or⌘+clickon macOS) each product card to open detail pages in separate tabs, then switch between them. - Compare feature lists — Each detail page presents features as bullet points. Comparing two products' feature lists side by side is the most effective way to spot differences.
- Check platforms and format — Some products are macOS-only, others are cross-platform. Some are web apps, others are local installers. Make sure the product supports the devices you use.
If you are trying to decide between several products and all of them are covered by Meteor Pass, buying the Pass is often the simpler choice — one payment unlocks everything, no piece-by-piece comparison needed.
Related articles
How to Claim a Free Product
Find free or limited-time-free products, claim them, and access them anytime from My Products.
How to Buy a Product or Meteor Pass
Learn about one-time purchases, Meteor Pass monthly/annual/lifetime plans, and post-payment delivery.
How to Redeem an Invitation Code
Find the redemption entry, enter your INV-XXXX invitation code, and receive your product license.
Still need help?
Send us the details of your issue, including the relevant environment and error message, and we'll look into it.
Submit a question