How to Edit Your Nickname, Avatar, and Bio
Update your nickname, upload an avatar, and set your bio on the account page.
What you will accomplish
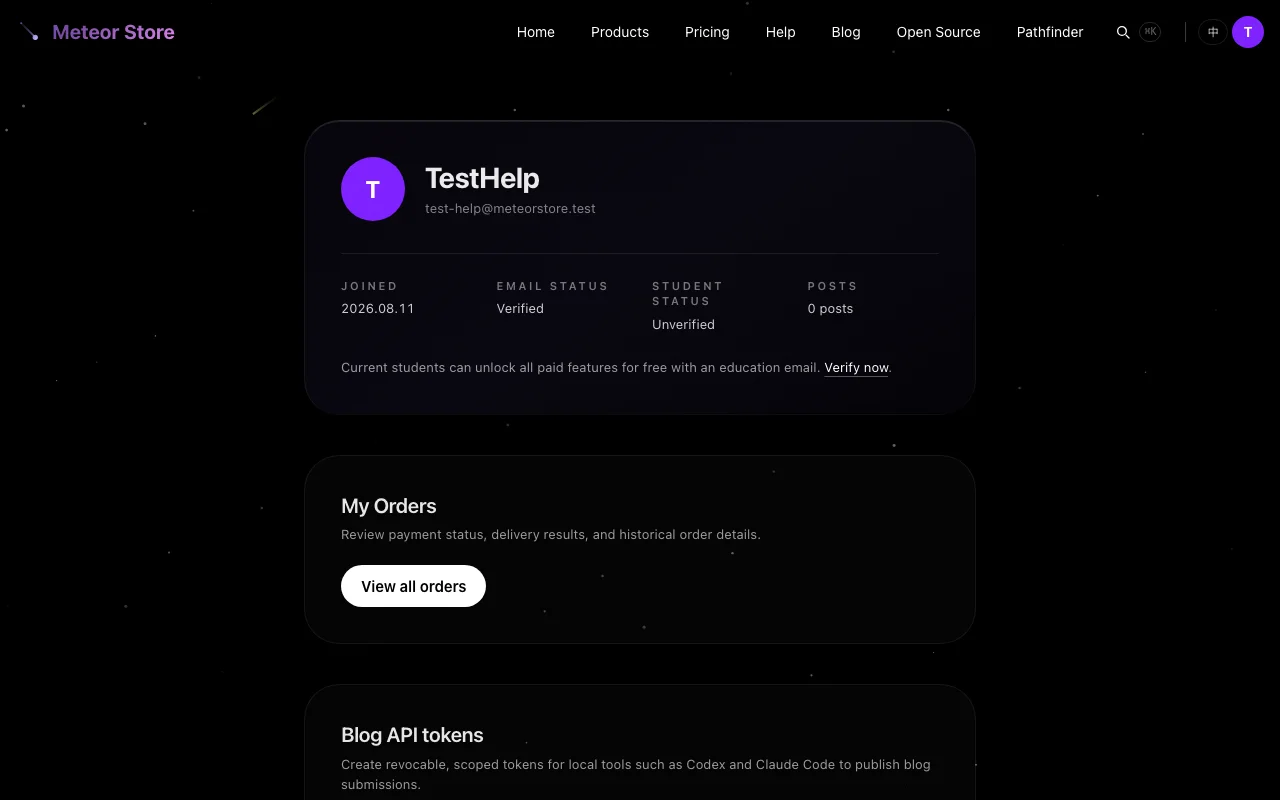 Update your display name, avatar, and bio from the Account Center so your personalized information appears in blog comments, post author sections, and other places around the site.
When to use this
You have registered and signed in to Meteor Store and want to complete your profile.
- Display name: Determines how your name appears in comments, posts, and the user menu.
- Avatar: Shown next to your comments, in the post author section, and in the top-left of your Account page.
- Bio: Appears on your Account identity card and at the end of your published blog posts.
Accessing the Account Center
After signing in, click your avatar or name area in the top bar and select "Account" from the dropdown, or navigate directly to /account.
If you are not signed in, the system will redirect you to the login page.
Editing your profile
Scroll down the Account page to the "Profile" section.
Changing your display name
Enter your preferred display name in the name input. This field is optional — if left blank, the system uses the part before the @ in your email (for example, hello@example.com becomes hello).
After editing, click the "Save" button to submit. A green "Saved" indicator will appear next to the button on success.
Uploading an avatar
Click the circular avatar area (or the "Upload" link below it) and select a local image. Supported formats are JPEG, PNG, WebP, and GIF, with a maximum file size of 5 MB.
Two things happen during upload:
- The browser automatically crops the image to a square and resizes it to 256×256 pixels.
- The resized image is uploaded to server storage.
You can also drag and drop an image file directly onto the avatar area for a faster workflow.
To remove an uploaded avatar, click the "Remove" link. The avatar will revert to the default purple letter icon.
Setting your bio
Write a short introduction in the bio field, up to 200 characters. The bio appears on your Account identity card and in the author section at the end of your published blog posts.
As with the display name, click "Save" after making changes.
Note: display name, avatar, and bio share one Save button
You can change all three fields at once and click "Save" once — no need to submit each field separately.
How to confirm it worked
A green "Saved" indicator next to the save button means the update was successful. Scroll back to the top of the page and check that the identity card reflects your changes.
Common questions
The avatar did not update immediately
If the old avatar is still showing, your browser may be caching it. Try refreshing the page or wait a few minutes and check again.
Avatar upload failed
Confirm the file is under 5 MB and in JPEG, PNG, WebP, or GIF format. Uploads can also fail on unstable connections — try again later.
My bio does not appear on my blog posts
The bio only shows at the end of your published blog posts. Drafts, pending, and rejected posts are not publicly visible and will not display the bio. Additionally, the site owner's own markdown-based articles have a fixed signature that is not affected by the account bio.
Next step
If you want to improve your account security further, you can set a stronger password in the "Change password" section of the Account page. See How to Change Password, Export Data, or Delete Your Account for detailed steps.
Related articles
How to Create an Account and Verify Your Email
Complete the registration form, pass the CAPTCHA, find the verification email, and activate your account.
How to Log In, Recover or Reset Your Password
Log in with your email and password, handle common login errors, and reset your password via email.
How to Change Password, Export Data, or Delete Your Account
Manage your account security: change your password, export your data, and delete your account.
Still need help?
Send us the details of your issue, including the relevant environment and error message, and we'll look into it.
Submit a question